Today I made this apron using 1 square of toilet paper, scissors, and tape. Robecca Steam is modeling the finished apron over her dress from the Julia Collection. I chose to use toilet paper to make this apron because it normally is about the same size for everybody and is usually readily available without a special trip to a craft store unlike fabric or felt. You could easily substitute felt or a fabric that doesn’t fray if you would prefer a longer lasting apron. Also, for variation you could make this apron with or without the bib or shoulder straps. The measurements and materials work well for Ever After High
and Monster High
dolls and probably Barbie but may need adjusting if you are use a doll much larger than these. For smaller dolls cut the pieces smaller.

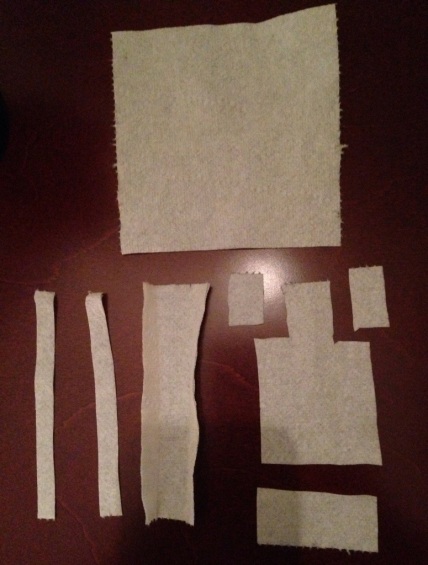
First, I cut the square in half. From the half on the left I cut two narrow rectangles to be the shoulder straps of the apron. The left over bit I’m using as the waist band. To make the waist band stronger I folded over the longer edges towards the center and flattened them. This also gives a neat look to the finished apron. The picture shows the work in progress, folding it nearly into thirds with the center part as the biggest is about right.
Since I was making a bib apron I held it the right hand rectangle up to the doll’s front at the height I wanted the top of the bib apron to be and cut out two rectangles on the side to make the bib part. You’ll want to use the TLAR method(That Looks About Right) for this part and it will vary depending on the doll. I cut this bib to cover the front of the doll but not to wrap around the side. The bottom of the bib is about where her waist is. I cut one half of the bib then folded the toilet paper in half to cut the other. In the picture I notice I didn’t quite cut it perfectly but this part is covered by the waist band so it doesn’t have to be perfect:)
Next, again holding up the apron to the doll, I trimmed the bottom of the apron part to the length I wanted it to be. At this point you could easily do some fancy cutting and make a different shape for the apron or cut the bottom as a curve or with scallops.
Take the strap pieces and place them along each side of the bib using the picture as a guide. Use a small piece of tape to hold them in place at the waist. This tape should be small enough to be hidden under the waist band.
Referring back to the first picture as a guide, put the apron on the doll. Place the shoulder straps over the dolls shoulders and have them hang down her back. Take the waist band and have the side without the overlapped edges showing and wrap it around the dolls waist and over the shoulder straps in the back. Try to cover up the shoulder strap edges and the tape that is holding them in place. You also may want to gather the edges of the apron at the waist underneath the waistband to add a little fullness. Once it looks good, tape the overlapping edges of the waist band in place and there you are!
To make this apron in felt or fabric that doesn’t fray use the same method for cutting out most of the apron pieces, except for the waist band which you may want to make longer so you can tie it in a knot instead of using tape. You could also use ribbon for the waist band. Sew the shoulder straps in place on the front instead of tapping them. Have fun!

